Monday, February 3, 2014

Yoymart Review

I had seen a couple of adds for Warhammer miniatures from Yoymart.com and I thought I would check them out.  I will say that I used to play Warhammer 40k years ago, but gave it up.  I really like the miniatures, but I had a hard time keeping up with the army of the month.  I was also sick of trying to play and having guys constantly telling me what I should do or should be doing.  Then the 3rd thing is the price.  I remember when I started playing it was $30 Can. for a box of 10 space marines.  I stopped when they hit $40. Now I see that on GW's website they are $55 for a tactical squad.  Its insane.  I have since sold of a bunch of my stuff for more than I paid originally.  Like I said I really liked the miniatures.  Then I checked out yoymart and decided to place an order.  
I got 2 tactical squads of marines, and a terminator squad.  They are exactly the same with a few exceptions. Let me preface this by saying there aren't flaws in the casting or anything like that I have noticed.  I saw a lot of posts of people knocking the quality of the detail before I ordered.  I have not had a bad experience with poor casts in the product I received. 

 First off they are cast out of a resin.  Seems like there is 2 different formulas they use.  This is based off the colors you can see in the pictures. The terminator pieces look quite a bit lighter than the tactical marines molds.  This also means they are brittle. I could easily snap pieces of loose sprue that came in the bags they were shipped in.

Secondly lots of flash.  The mold lines are prominent as you can see with these terminator legs and there is quite a lot of excess on the missile launcher top as well.  
Here is a closer look at the tactical squads sprue.  You can see a lot of flash on the back pack and power sword on the left.  

Anyways everything was shipped with what appeared to be all the pieces.  I dont mind clearing a lot of flash, and the price is right.  Each tactical squad was only $21 USD, and the terminators were only like $19.  I am happy with my purchase, and probably would order from them in the future.  

Also I was not asked or compensated in any way by Yoymart.com to provide this review.

Sunday, February 2, 2014

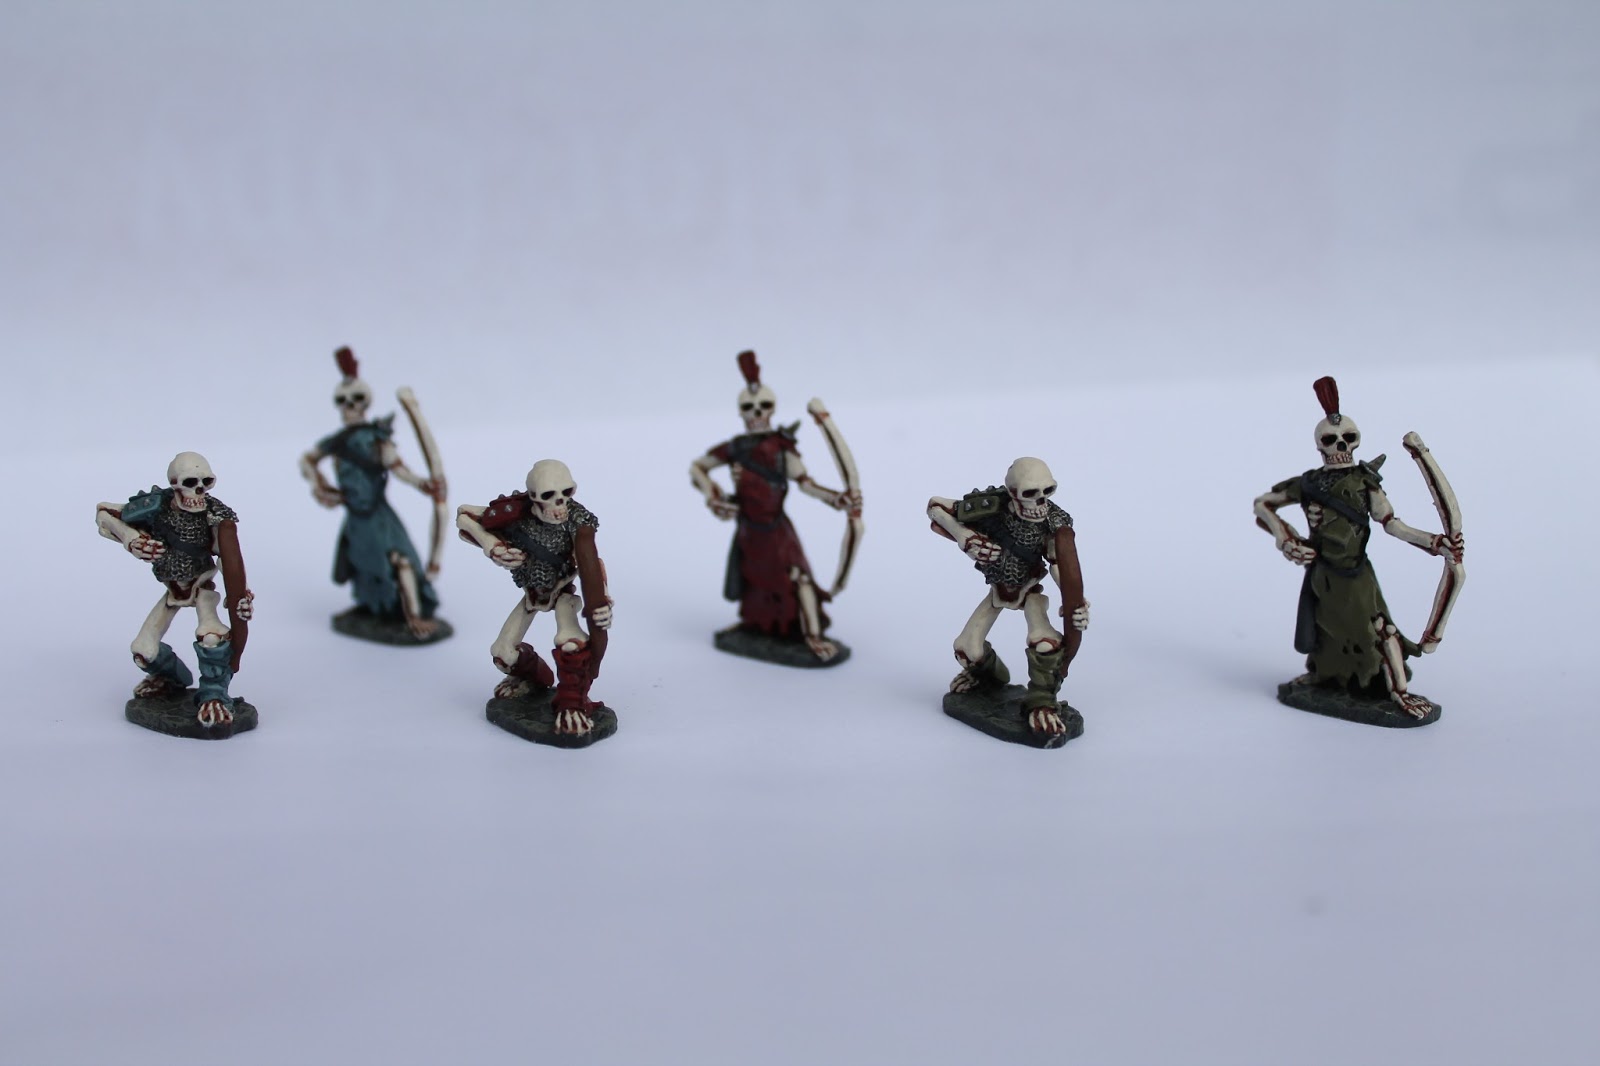
Harlequin Miniatures Skeletons... My first airbrushed.

Well I splurged and I got myself an airbrush for Christmas.  Since I ordered it from eBay and my hose never showed it wasn't able to start using it until mid January.  I decided I wanted to try something simple for my first figures with it.  These 3 Skeletons I got off of Kijiji, which if you don't know its a better version of craigslist that people tend to use more in Canada.  They are by Harlequin Miniatures and they were stamped 96', so they are coming close to 20 years old.  They are nice sculpts though and are available here.  I layered them with 3 colors and then gave them a burnt umber oil wash.  The colors go from ocher brown -> bleached bone or bone white -> 50/50 bleached bone/ white.  I thought they turned out pretty well.  I hope to use these with my new pathfinder rule book I picked up.

I know the picture isnt great.  But I think they look good even with bad lighting. 

Sunday, January 19, 2014

Goal Achieved, Its been a good year.

Well I am pretty excited, I have finished my goal for this last year to paint 52 miniatures in 52 weeks. I am happy that I finished, but I do have a couple of WIP pieces that I wasn't able to complete. One of those a large red dragon is only 3/4 done and still has quite a bit of work left to be done on it. Well here are the piece that I completed. This includes all the terrain that they are displayed on.

Thanks to those who shared their support and followed my progress when I was posting earlier this year. Keep checking in to see what's going on with my blog in the future, I have good plans for projects this next year. 

Saturday, January 11, 2014

Re-Branding

So the year is almost up and I have decided to re brand my blog since I will no longer be continuing the goal of 52 minis in 52 weeks into this next year.  I am coming up on my year end on Jan 20th and I am about 9 miniatures behind, but I am confident that I will finish by the 20th.  As of now though my blog is going to be more casual and less goal driven.  I know I didn't post very much in the later part of the year, but I found that worrying about posting took me away from the painting which I enjoy.  But look forward to RPG and miniature related posts on this blog in the near future.

Wednesday, September 4, 2013

Fixing Bent Reaper Bones

A lot of people who have purchased bones miniatures have probably seen that swords are bent, figures don't stand up as well sometimes because they are warped on the bases. Soft plastic miniatures unlike metal figures, cannot be simply bent back into shape. There is a way however to get your figures to look straight and perfect again. If you take boiling water (doesn't have to be a rolling boil) and a container of cold water (ice is recommended but not necessary). Grab the bent figure with tongs. (Warning hot water can scald you and steam can cause 1st and 2nd degree burns.) Dip the bent figure in the water for a few seconds. Generally 5-10 for thin parts and 10-30 for thick. Take the figure out of the water and bend it to the way you want. Most of the times the plastic straightened up without me having to adjust anything. Once you have bent the figure the way you want, place mini in the cool water. This will cause the plastic to stiffen up again.  Here are some examples of figures I did with this technique. 
Some things I could not fix totally with this method. But out of the 30 figures I straightened out. Only 2 couldn't be fixed. One figure was to thick to fix. And the other can be repaired by basing it on a different base. 

Thursday, August 22, 2013

#15 Its a Purple Worm!

Here it is, a Purple Worm.  Not a very exciting miniature.  It was an expensive one though.  I ended up getting a speeding ticket in the mail that I got on the way home from picking this guy up.  From what I could find on the internet this is a 1982 Giant Worm miniature released by Citadel.  I guess I can add the Games Workshop tag to my post now right? Any ways what can I say about this other than its a terrible sculpt.  I only say this because I know I can do better than this, and I have.  It wasn't fun to paint, just layering purple, then purple with black wash, then layers of more purple.  The base I made out of Hirst Arts Castle Molds. It looks like the base is 3''x 3'' but its actually about 1/3 smaller than that.  I thought it would look weird if I based him on to large of a base since the mini isn't as huge as it is supposed to be.


The Hideous Maw of the Worm

#14 Granadier 1984 Vampire

I know I said in the past that I have painted to many vampires but here is another. I think this one might be my favorite. Also, I know I am far behind my goal, but I have another couple minis I have painted that I will be posting soon. I think sometimes the pressure of putting together blog posts scares me off of finishing projects. I have about 13 different minis on the go, but I think I have gotten a little bit of a second wind. I feel I can catch up and finish my goal by next feb. They say us Albertans are getting an early winter this year, sounds like a good excuse to spend time inside painting. Any ways here's the figure. Let me know what you think. 


Saturday, August 3, 2013

I know its been a little while.

I know its been a little while since my last post, and I wanted to assure all of you that I am still painting.  I have been working on a bunch of lizard men for a Song of Blade and Heroes war band.  Happy news, my bones figures finally arrived, I want to do a post fully of all the ones I got.  I am really impressed with them all, especially how firm the larger models are.  Anyways if any of you are wondering why I haven't posted in a while lots of things have been happening this summer.  I am still excited to finish my goal, just have a little catching up to do.

Wednesday, April 17, 2013

WIP Lizardmen

So my post yesterday I talked about my Lizardmen war band I am trying to put together for A Song of Blades and Heroes. I thought I would try out the paint scheme that I came up with for them. Let me know what you think so far. FYI this is a wip, I know the pictures are bad and I am not even close to being done with the blue.


Tuesday, April 16, 2013

#13 Bones Ogre Chieftain


This week is a pretty simple post.  I finished this bones figure of an Ogre Chieftain sculpted by Jason Wiebe.  I have mentioned before that I did back the Bones Kickstarter I picked this guy up before the kickstarter (still haven't received my minis).  I had based this guy for painting before I started my skeleton archers that I posted about 2 weeks ago.  I am still on track with my goal, although only 1 week ahead now instead of 2. I have a bunch of projects on the go right now.  I bought myself a copy of A Song of Blades and Heroes rules and I am hoping my D&D friends will want to give it a try.  I am trying to get a warband of minis together for that to paint.  I have a bunch of GW lizardmen that I am currently modeling and basing.  I might start painting those after this next week if I can get the bases done.  I also picked up a bunch of old Granadier and Ral Partha miniatures off of my local kijiji classifieds and I am really excited to paint those minis up as well. Ok the thing I really liked about this paint job was how the hair on the legs came out.  I found it looked really natural and blended well with his skin.  Something that I think I could have done better was the wood club.  I kept it kinda dark because of all the other brown tones on this miniature, but I think I could have done a better job highlighting. One thing I will say about the bones minis is although they are cheap (this figure was $2.50 while the pewter was $11.49), the mold lines on them can be terrible and really hard to spot. Thanks for checking out the blog again and feel free to leave comments below.  


Sunday, March 31, 2013

#7-12 The Bones Brigade

So 6 miniatures in 3 weeks turned into 6 in 4. I know it's been a while since my last post, but in this time I have been able to do some other things with my time than paint (Skyrim, LoL). I doubt I will try to do this many at a time again. It's not that I cant it just begins to feel like a chore. It's probably the reason I didn't get a lot of my Warhammer 40k miniatures painted when I used to play. Although it does feel good to be 2 weeks ahead of my goal.
Alright now for the skeletons. These guys come from the RAFM box set Shambling Death. I have quite a few RAFM miniatures for 2 reasons. They are readily available at The Sentry Box where I buy a lot of my miniatures and hobby supplies, and they are cheap compared to a lot of the other companies out there. This box of skeletons only cost $22 and came with 18 miniatures. I painted the robes on them different colors so that when I use them for D&D I can tell them apart on the table.
Things I liked about these paint job was the blue and green clothing. I think I am going to try and work more with these colors in the future. I didn't like the bone color. Particularly the brown ink. I think in the future I am going to prime white from now on with skeletons.
Let me know what you think, and if you have suggestions for future minis. I might do a sci-fi figure in the next couple of weeks maybe even a GW model.


Taking advantage of the warm day to clear coat and prime my minis.
 I need to start editing my photos so they don't look jumbled like this.


Monday, March 11, 2013

WIP skeletons

I thought I would work on a couple of skeletons for the next few weeks. Here is a quick pic of what I have going so far. I'll have more information on what type of miniatures they are in the future. I cant really put links up for this post since I am posting with my phone.


Thursday, March 7, 2013

Sci-Fi to Fantasy: Space Marines Journy

I did this top conversion about 2 years ago where I shaved off the back pack spot of the emperors champion model to turn him into a knight and I found that it worked pretty good.  No putty was added just some patient shaving with a hobby knife and filing.  


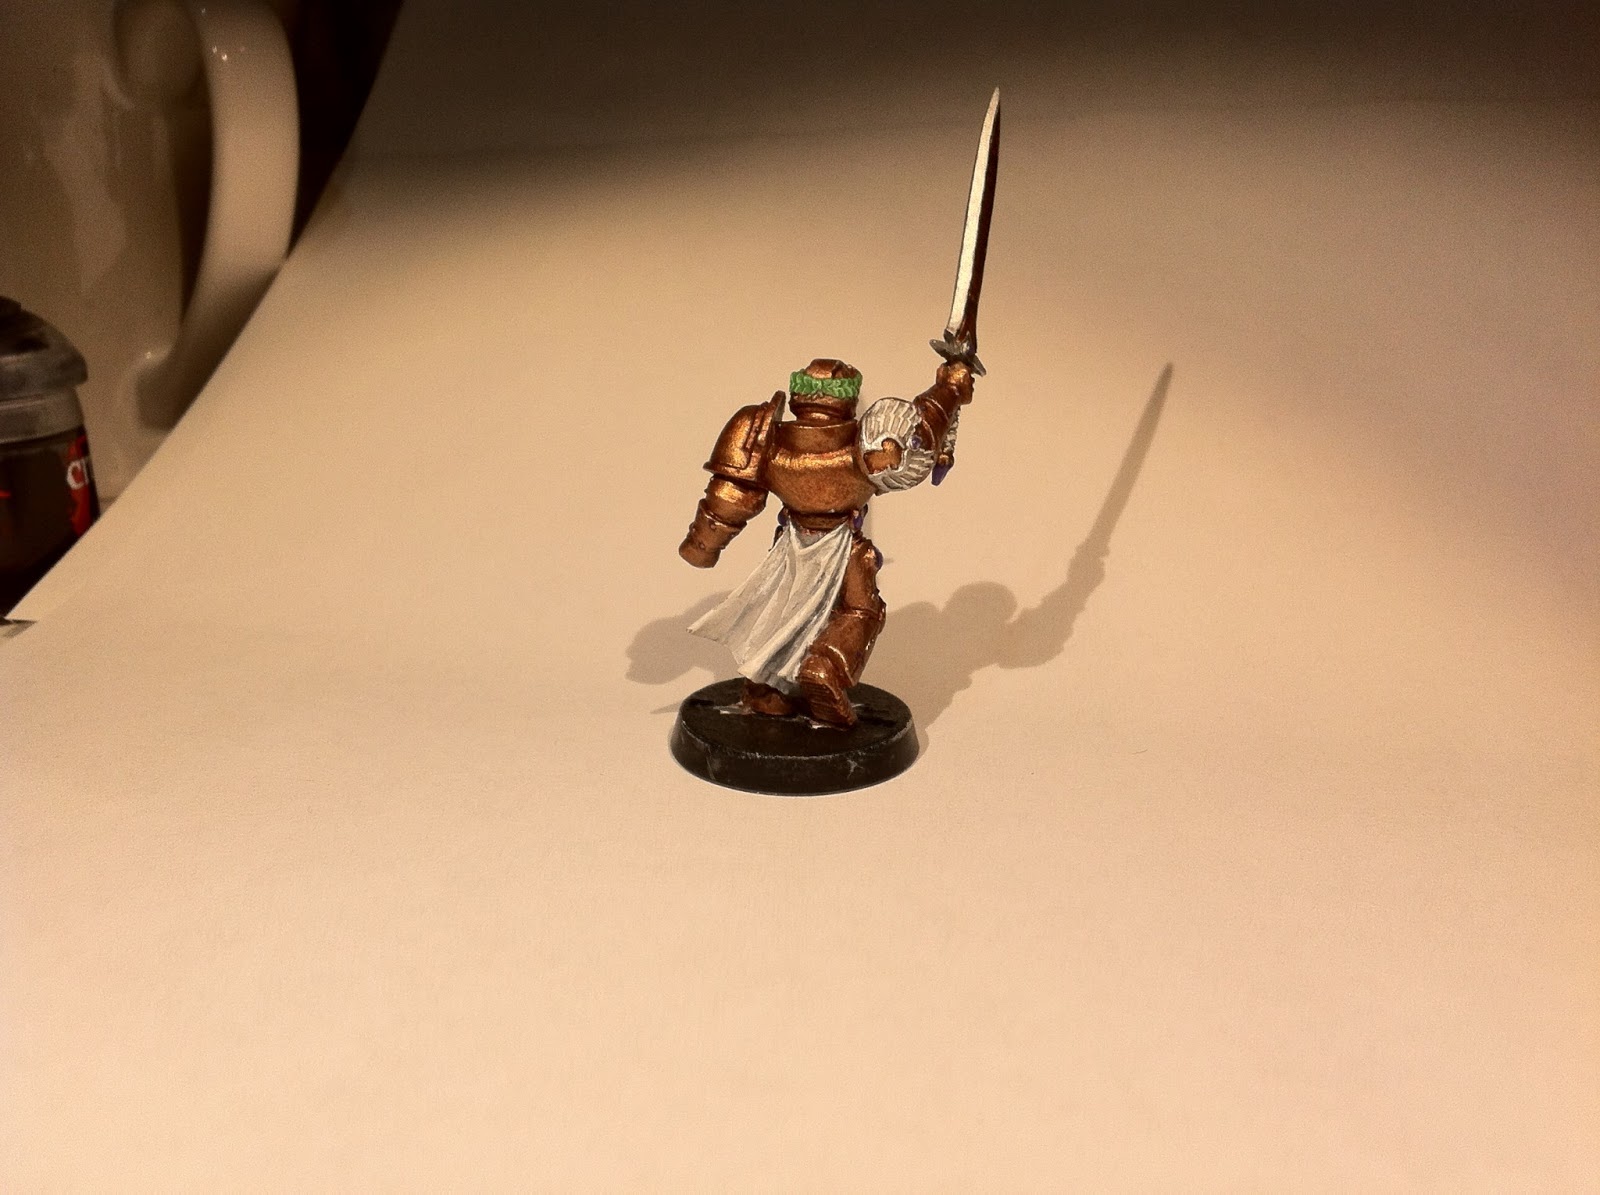
The other day I did the same thing with a chaplain, I am thinking about turning him into some sort of dark cleric.  I shaved his back pack spot off as well as added an old chaos marauders arm for his right hand.  I had to take out a section of the arm because it looks to big for his body.  It looks better now with about 2mm taken out but I think we can all be completely honest and say that GW sculpts often times have strange proportions. I am thinking either a shield or a chain for his right hand but dont have any good ideas for what type at the moment. I mostly just wanted to show some possibilities for your old space marines.


Sunday, March 3, 2013

#6 Eldessa, The Necromancer


Six weeks in and still going strong.  This week I chose a miniature that I had started over a year ago but never finished painting. Although she was partially painted before I redid most of the figure except for the metallic shoulder pad.  It was an interesting mini to paint, lots of skin and robes.  To be honest I think I need to get my eyes checked because I see a lot of details in my photos that I don't think I can pick out while I am painting.  I'm sure it is time anyway since I haven't had my eyes checked in over 10 yrs.


The part I liked most about how this paint job came out had to be the purple robes.  My biggest dislike was the sword.  I probably rushed it a little.  Some of you may be wondering why my bases always seem to be a little glossy.  I use Vallejo Glossy Black on the edges of my bases to give it a finished look.  This mini had a base sculpted to it but I thought she would tip over to easily so I pinned her to a simple square base.


Links:
Eldessa, Necromancer Reaper Mini
P.S. TGFRFF (Thank Goodness for Reaper Figure Finder) I couldn't remember what this one was called it was so long ago I bought and opened it.

Tuesday, February 26, 2013

Woodland Base Inserts (WIP)

I have been looking at some basing ideas for upcoming projects, and came across one on a blog for some woodland basses.  I have a couple of half-lings and wood elves that I thought would look good on a base themed that way.  I pulled out my putty turned on Jurassic Park and started sculpting a couple of logs and stumps.

I sculpted the stumps on little plastic discs I made that slip into the lipped style bases.  Its just a nice way of doing it to make sure that the material is flush the with disc.  The way I made them is just old plastic packaging.  I apologize now for the poor photos, it was late at night when I did these and didn't feel like setting up to take good pics.

Sunday, February 24, 2013

#5 Daring Dwarf

This week I thought I would do another little dwarf.  This mostly because I based him the same time as the other dwarf that I did.  I was also excited to do this dwarf because of his fiery beard.  I don't think a lot of miniatures out there pull off red hair very well, but with dwarves it just seems to fit them.   This little guy was fun to paint. Someone commented on one of my earlier posts that they liked their dwarves in blue, so I thought this would be a good color for him. One thing about this figure I didn't like to much was the was the way his cape was sculpted.  It has a weird flow to it. I thought the helmet came out particularly well on this figure, and something I could do better was the boots.  I need to learn how to paint black leather better.  Thanks for checking this figure out +1 it if you like it.


Links: 
Dwarf Crossbowmen

Friday, February 22, 2013

Critical Hit, Epic Book Score

I had a really good find the other day after searching kijiji for Dungeons and Dragons stuff. One person had an add for some 4th edition D&D books listed. For $15 I picked up the Adventurer's Vault, Martial Power, Manual of the Plains, DM Screen and character sheets. The character sheets had a 4 sheets on card stock, and 4 sets of unused blank power cards, and the books were all in mint condition. All said and done I was pretty pleased with myself and am looking forward to delving into my new reading material.

Saturday, February 16, 2013

#4 Another Blood Sucking Vampire

I know I did a vampire miniature last week, but wanted to do the other one I had for this week.  I think it turned out better than the last one did anyway. This miniature was a real challenge for me.  There is a lot of detail on the figure that I wanted to capture and really express with different colors, one was the imp. I had completely finished the vampire but hadn't painted that little devil gripping his leg.  I thought that a fire imp theme would look really cool and cause him to pop out in the figure. It almost makes you wonder why they are together when clearly the two are so different.  This figure is again done by Reaper Miniatures and I will include the link for him below.  There are two sculpts for this guy, and honestly if I had seen the other figure first I would have bought it instead. Something I liked about this pant job besides the imp was his robe.  It came out really nicely and contrasts well with the red shirt.  I think I could have done better work on the writing of the book.  I touched up a place where t     he black lines were pretty thick, but I could have spent more time in the area doing some really cool detail.  


 One last thing.  I am using a Cannon Rebel t3 12mp camera to take my photos, but I was wondering if anyone had some tips for helping me improve my photos.  I know lighting is a big issue for me because I am taking my photos in the basement where I paint, but I was wondering if someone out there has seen tutorials for photographing miniatures that have worked for them? Again thanks for checking out my blog, and post your comments below.


This picture has no flash.


Links:


Sunday, February 10, 2013

#3 Damien Mundo

The Vampire Lord Damien Mundo
One of my favorite creatures to throw at my friends when playing dungeons and dragons is a vampire. I think they are one of the best villains you can put in a campaign. They allow your cleric characters feel powerful when they hold them at bay with their religious symbol. They cause your fighter absolute horror when they become dominated. But my favorite thing is when your PC's are just about to finish the fight, they turn into a gaseous form allowing them to escape only to turn up later for revenge. The main vampire we have used in our adventures I named Damien Mundo. I bought this miniature specifically for this character, and every time I put him on the table for game night it has always been a memorable experience. That being said, the thing I liked about this mini was how his armor turned out. I haven't done a lot of non metal colored armor and I should try to do it more. Something that could have been better was his cape, I feel like I kinda rushed it and maybe I will go back and fix it a bit. Overall this was a good mini except for a bad mold line that ran right though the left side of his face. All in all I am glad I finally put some color on this figure.

Links:
Reaper Miniature Vampire Gabriel Darkblood


Friday, February 8, 2013

Cauldron Conversion


Art Ross (left) Stanley Cup (Center)


A few years ago McDonald's put out a line of hockey trophies to sell more hamburgers in Canada, as a result today these babies can be found at most Canadian thrift stores from time to time (not sure if they had this promotion anywhere else).  I was able to round up 3 of them, to convert into dungeon pieces. 2 Art Ross trophies and 1 Stanley Cup.  All I had to do was pull off the cup by twisting until the bottom part snapped off the large base. Once I had them off there was a plastic lip left on the bottem wich was shaved with a hobby knife, and then the base was sanded level. I then primed them black, and base coated with chaos black. I dry brushed the raised detail with Vallejo model color old gold, and then highlighted with a brass. Overall a pretty fast paint job and easy conversion. Even though they are plastic I definitely recommend hitting them with a matte coat sealer just to help them hold up against heavy handling since I just primed right over the glossy silver paint job they had before.  Thanks for checking out this post, and feel free to leave any comments you might have below.